Xamarin Visual StudioでSQL serverに接続してみました。
Xamarin Visual StudioでSQL serverに接続してみました。
できるようになるのに、3日くらいかかりました。
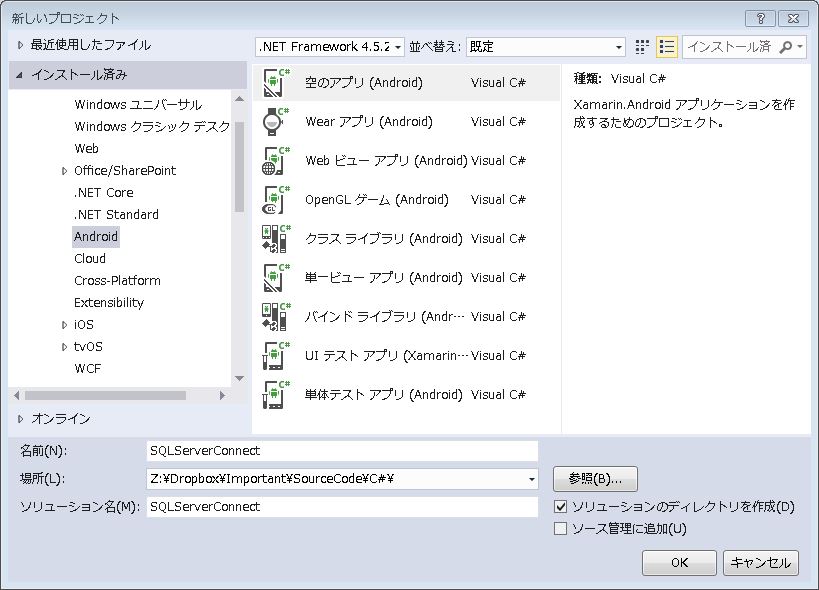
まずは、SQLServerConnectというソリューションを作成
ソリューションエクスプローラで、
「参照」を右クリック、「参照の追加」をクリックします。
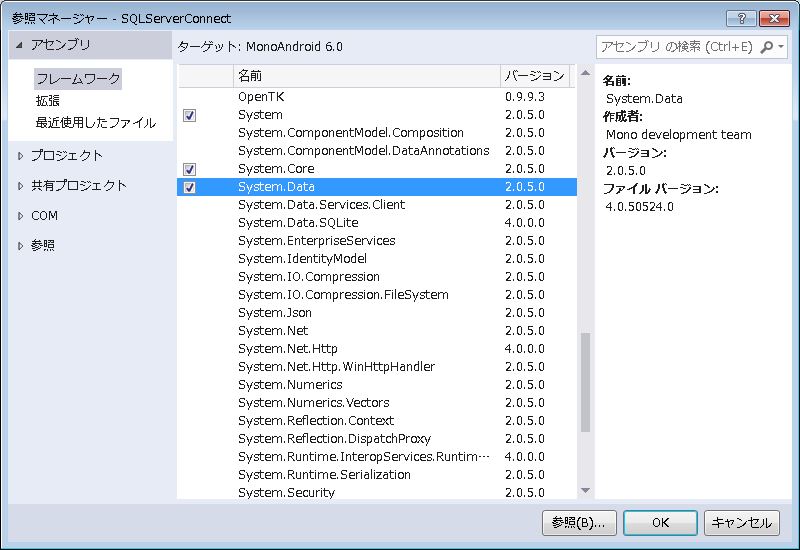
System.Dataを追加しました。
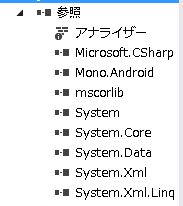
ソリューションエクスプローラで、
「Properties」を右クリック、「開く」をクリックします。
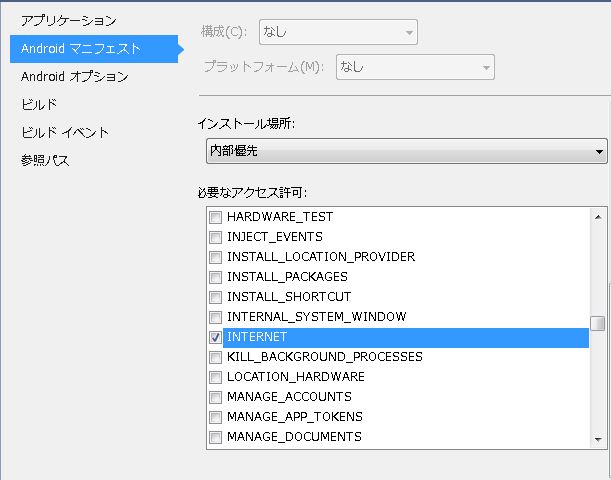
Androidマニフェスト>必要なアクセス許可で、
INTERNETを許可しておきます。
Main.axmlにはSQL serverの読取り結果を表示するためにテキストビューを配置します。
Main.axmlのコードは以下です。
<LinearLayout xmlns:android=“http://schemas.android.com/apk/res/android”
android:orientation=“vertical”
android:layout_width=“match_parent”
android:layout_height=“match_parent”
android:minWidth=“25px”
android:minHeight=“25px”>
<TextView
android:text=“結果”
android:textAppearance=“?android:attr/textAppearanceLarge”
android:layout_width=“match_parent”
android:layout_height=“wrap_content”
android:id=”@+id/textView1” />
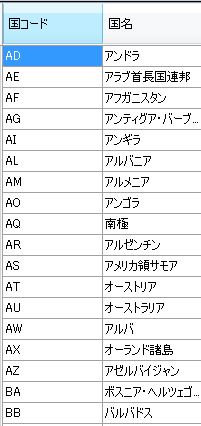
「SELECT * FROM 国」というSQL文で、
国テーブルを読み込んでみます。
国テーブルの中身はこんな感じになっています。
MainActivity.csのコードは以下です。
using Android.App;
using Android.Widget;
using Android.OS;
using System.Data.SqlClient;
using System;
namespace SQLServerConnect
{
[Activity(Label = “SQLServerConnect”, MainLauncher = true, Icon = “@drawable/icon”)]
public class MainActivity : Activity
{
protected override void OnCreate(Bundle bundle)
{
base.OnCreate(bundle);
// Set our view from the “main” layout resource
SetContentView (Resource.Layout.Main);
var textView = FindViewById
string sql;
SqlDataReader sqlReader;
SqlConnectionStringBuilder dbConString = new SqlConnectionStringBuilder();
dbConString.UserID = “ユーザーID”;
dbConString.Password = “パスワード”;
dbConString.DataSource = “サーバー名”;
dbConString.InitialCatalog = “データベース名”;
sql = “SELECT * FROM 国 ”;
SqlConnection con = new SqlConnection(dbConString.ConnectionString);
try
{
con.Open();
SqlCommand command = new SqlCommand(sql, con);
sqlReader = command.ExecuteReader();
textView.Text = "";
while (sqlReader.Read())
{
textView.Text += sqlReader[0].ToString() + ”:” + sqlReader[1].ToString() + System.Environment.NewLine;
}
}
catch (SqlException ex)
{
//エラーが発生したら、TextViewに表示します。
textView.Text = ex.Message + System.Environment.NewLine + ex.StackTrace;
}
catch (Exception ex1)
{
//エラーが発生したら、TextViewに表示します。
textView.Text = ex1.Message + System.Environment.NewLine + ex1.StackTrace;
}
finally
{
con.Close();
}
}
}
}
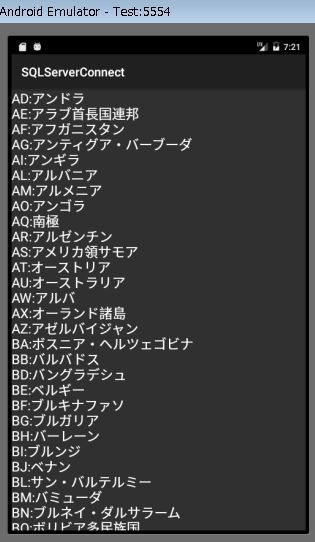
読取り成功しました。
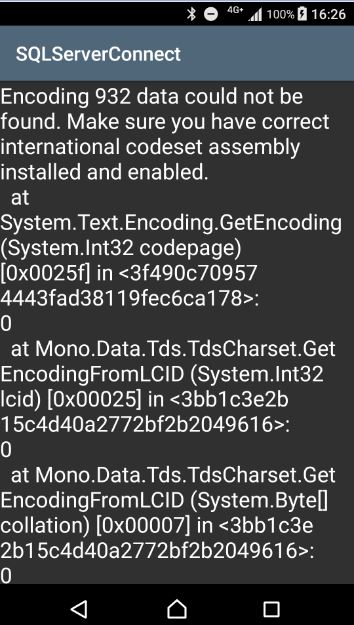
これを実機で動かすと、以下のエラーが発生します。
「Encoding 932 data could not be found. Make sure you have correct international codeset assembly installed and enabled. 」
このエラーは、以下の処理をすれば発生しなくなります。
ソリューションエクスプローラで、
「Properties」を右クリック、「開く」をクリックします。
「Androidオプション」で「リンカー」タブを開き、「CJK」にチェックを入れます。
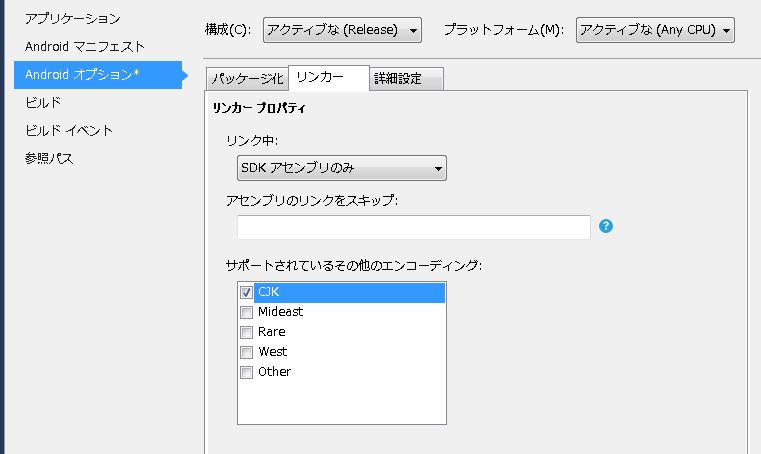
CJKは、China、Japan、Koreaという意味で、Encoding 932はShift-JISなので、これで追加されます。
実機でも接続成功しました。
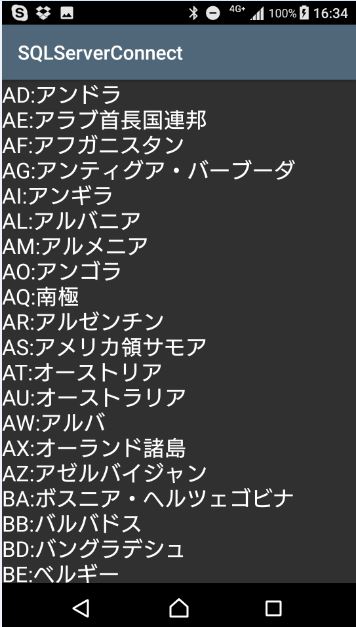
上のテストでは、Microsoft AzureのSQL Databeseに接続しました。
Azureの場合、サーバーのURLは、
xxxxx.database.windows.net
というフォーマットになります。
ユーザーID:uuuu
パスワード:pppp
データベース名:dddd
だとすると、
接続文字列は、次のように設定します。
dbConString.UserID = “uuuu@xxxxx”;
dbConString.Password = “pppp”;
dbConString.DataSource = “xxxxx.database.windows.net,1433”;
dbConString.InitialCatalog = “dddd”;
次に、ローカルのSQL Server Expressにも接続してみました。
SQL Server Expressは、接続ポートを12345と固定しました。
ユーザーID:sa
パスワード:pppp
データベース名:dddd
インスタンス名:SQLExpress
サーバーのIPアドレス:192.168.1.100
で、接続を試みてみました。
接続文字列は以下です。
dbConString.UserID = “sa”;
dbConString.Password = “pppp”;
dbConString.DataSource = “192.168.1.100\SQLExpress,12345”;
dbConString.InitialCatalog = “dddd”;
なぜか接続できません。
エラーメッセージは、
「Server does not exist or connection refused.」
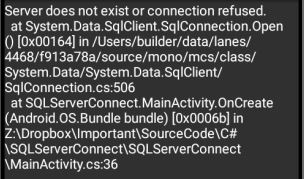
DataSourceからインスタンス名を削除してみたら接続できました。
dbConString.UserID = “sa”;
dbConString.Password = “pppp”;
dbConString.DataSource = “192.168.1.100,12345”;
dbConString.InitialCatalog = “dddd”;
原因は不明です。
PC同士の接続の場合は、インスタンス名は必要です。
ポートを指定してあると、Androidなどの端末から接続するときは、インスタンス名を省略する必要があるのかもしれません。
Xamarin関連書籍の検索結果はこちらです。